이전 글을 보고 오시면 이해하기 수월 합니다.
AI 트래픽을 관리하는 방법: APISIX로 AI Gateway 만들기 - 1편
이번에는 APISIX를 설치해보고 Custom Plugin 만드는 방법에 대해 알아보겠습니다.
APISIX 설치
저는 쿠버네티스 위에 설치를 진행하여서 Helm 차트로 설치를 하였습니다.
설치 명령어
helm repo add apisix https://charts.apiseven.com
helm repo update
helm install apisix apisix/apisix --create-namespace  --namespace apisix -f values.yaml
values.yaml 설정
# apisix 파드의 리소스 사용량 설정
resources:
  requests:
    cpu: 100m
    memory: 512Mi
  limits:
    cpu: 500m
    memory: 512Mi

# apisix 파드의 오토스케일링 설정
autoscaling:
  enabled: true
  # -- HPA version, the value is "v2" or "v2beta1", default "v2"
  version: v2
  minReplicas: 2
  maxReplicas: 100
  targetCPUUtilizationPercentage: 80
  targetMemoryUtilizationPercentage: 80

# apisix 설정
apisix:
  admin:
    credentials:
      # admin 역할의 credentials 정의
      admin: <원하는 내용으로 정의>
      # viewer 역할의 credentials 정의
      viewer: <원하는 내용으로 정의>
    allow:
      # admin API에 접근 할 수 있는 IP 대역 설정, 현재는 테스트 용이여서 다 열어두었습니다.
      ipList:
        - 0.0.0.0/0
  prometheus:
    enabled: true # prometheus가 apisix의 메트릭을 수집할 수 있도록 설정
    path: /apisix/prometheus/metrics
    metricPrefix: apisix_
    containerPort: 9091

etcd:
  persistence:
  # 중요, etcd 파드에 PVC를 연결을 안해주면 APISIX 설치가 안됩니다.
  # 또한 persistence 정의하는 부분은 기본적으로 values.yaml 파일에 없고, bitnami의 persistence 양식으로 직접 정의를 해주셔야 합니다.
    enabled: true
    storageClass: "<스토리지 클래스를 사용하면 적어줄 것, 사용안하면 비워둘것,>"
    size: "10Gi"
    accessModes:
      - ReadWriteOnce
위와 같이 values.yaml 파일을 정의하고 설치를 해주면 정상적으로 설치가 완료 됩니다.
# kubectl get pods -n apisix
NAME READY STATUS RESTARTS AGE
apisix-6c894c7867-9kfd5 1/1 Running 0 3d20h
apisix-6c894c7867-cvvgz 1/1 Running 0 3d20h
apisix-etcd-0 1/1 Running 0 10d
apisix-etcd-1 1/1 Running 0 10d
apisix-etcd-2 1/1 Running 0 10d
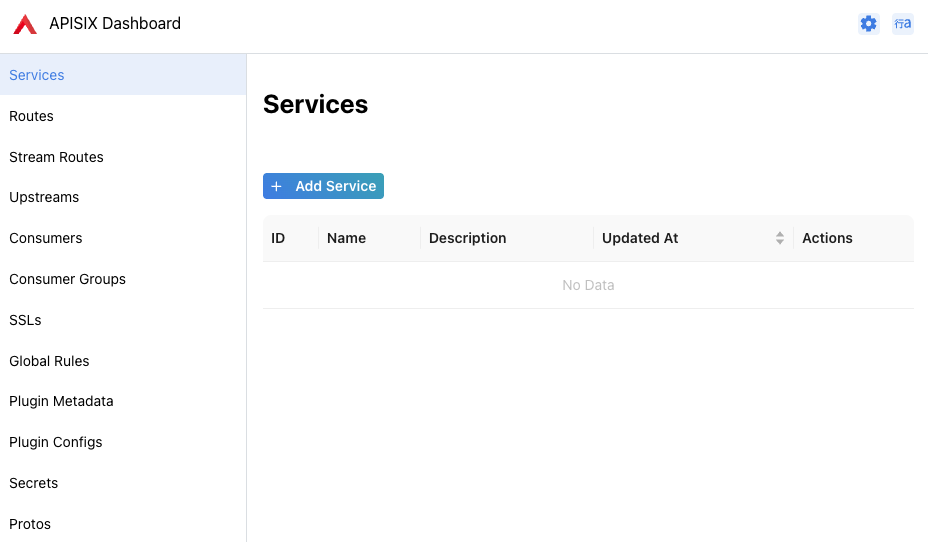
apisix-etcd-pre-upgrade-hvxc6 0/1 Completed 0 3d20h그리고 APISIX의 Admin 대시보드가 정상적으로 접속이 되는지 확인해줍니다.
(저는 Admin Service를 clusterIP로 해두어서 Ingress로 노출시켰습니다.)
Custom Plugin 만들기
이번에는 Custom Plugin을 만들고 붙여보도록 하겠습니다.
생성할 플러그인 설명
저는 OpenAI API를 사용할 때 나온 총 토큰 개수를 크레딧이라는 금액으로 1:1 비율로 변경해서 Redis에 보내주는 플러그인을 생성하였습니다.
먼저 lua로 스크립트를 작성해주고, k8s에서 configmap으로 만들어줍니다.
# kubectl create configmap token2credit --from-file <lua 언어로 만든 스크립트.lua> -n apisix그리고 values.yaml 파일에서 내용을 수정해줍니다.
apisix:
  customPlugins:
    enabled: true
    # custom plugin으로 사용할 lua 스크립트 저장소 위치 지정
    luaPath: "/opts/custom_plugins/?.lua;"
    plugins:
      # customPlugin의 이름
      - name: "token2credit"
        attrs: {}
        configMap:
          # 생성한 configmap의 이름
          name: "token2credit"
          mounts:
            # configmap에 저장된 lua 스크립트의 key 지정하여 path에 정의된 위치에 lua 스크립트 저장
            # path에 저장을 할 때, 반드시 위에서 정의한 luaPath에서 /apisix/plugins 경로를 붙여서 저장을 해주어야 합니다.
            # 이유는 APISIX가 requir
            - key: "convert-token-to-credit.lua"
              path: "/opts/custom_plugins/apisix/plugins/token2credit.lua"
근거 공식문서 내용
https://apisix.apache.org/docs/apisix/plugin-develop/

이렇게 Custom Plugin으로 사용할 lua 스크립트 파일을 지정을 해준 다음에는,
apisix에서 해당 플러그인을 인식할 수 있도록 꼭 지정을 해주어야 합니다.
다시 values.yaml 파일로 돌아가서
apisix:
  # -- Customize the list of APISIX plugins to enable. By default, APISIX's default plugins are automatically used. See [config-default.yaml](https://github.com/apache/apisix/blob/master/conf/config-default.yaml)
  plugins:
    - token2credit # 앞서 생성한 커스텀 플러그인의 이름 지정
    - real-ip
    - ai
    - client-control
    - proxy-control
    - request-id
    - zipkin
    - ext-plugin-pre-req
    - fault-injection
    - mocking
    - serverless-pre-function
    - cors
    - ip-restriction
    - ua-restriction
    - referer-restriction
    - csrf
    - uri-blocker
    - request-validation
    - chaitin-waf
    - multi-auth
    - openid-connect
    - cas-auth
    - authz-casbin
    - authz-casdoor
    - wolf-rbac
    - ldap-auth
    - hmac-auth
    - basic-auth
    - jwt-auth
    - jwe-decrypt
    - key-auth
    - consumer-restriction
    - attach-consumer-label
    - forward-auth
    - opa
    - authz-keycloak
    - proxy-cache
    - body-transformer
    - ai-prompt-template
    - ai-prompt-decorator
    - ai-prompt-guard
    - ai-rag
    - ai-rate-limiting
    - ai-proxy-multi
    - ai-proxy
    - ai-aws-content-moderation
    - ai-aliyun-content-moderation
    - proxy-mirror
    - proxy-rewrite
    - workflow
    - api-breaker
    - limit-conn
    - limit-count
    - limit-req
    - gzip
    - traffic-split
    - redirect
    - response-rewrite
    - mcp-bridge
    - degraphql
    - kafka-proxy
    - grpc-transcode
    - grpc-web
    - http-dubbo
    - public-api
    - prometheus
    - datadog
    - lago
    - loki-logger
    - elasticsearch-logger
    - echo
    - loggly
    - http-logger
    - splunk-hec-logging
    - skywalking-logger
    - google-cloud-logging
    - sls-logger
    - tcp-logger
    - kafka-logger
    - rocketmq-logger
    - syslog
    - udp-logger
    - file-logger
    - clickhouse-logger
    - tencent-cloud-cls
    - inspect
    - example-plugin
    - aws-lambda
    - azure-functions
    - openwhisk
    - openfunction
    - serverless-post-function
    - ext-plugin-post-req
    - ext-plugin-post-resp
    - ai-request-rewrite
그리고 여기서 또 중요한 것이, plugins에 Custom Plugin의 이름만 지정을 해주면,
기본적인 플러그인들은 사용을 못하게 됩니다.
따라서 default plugin 들도 같이 사용을 하려면 values.yaml 의 plugins에 모두 정의를 해주어야 합니다.
이제 helm upgrade 시켜주고 난 후 잘 적용이 되었는지 확인해보겠습니다.
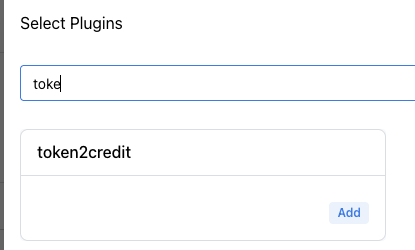
Custom Plugin 생성 결과 확인
Admin Dashboard 에서 플러그인 목록을 보면, 아래 이미지 처럼 나오는 것을 확인할 수 있습니다.
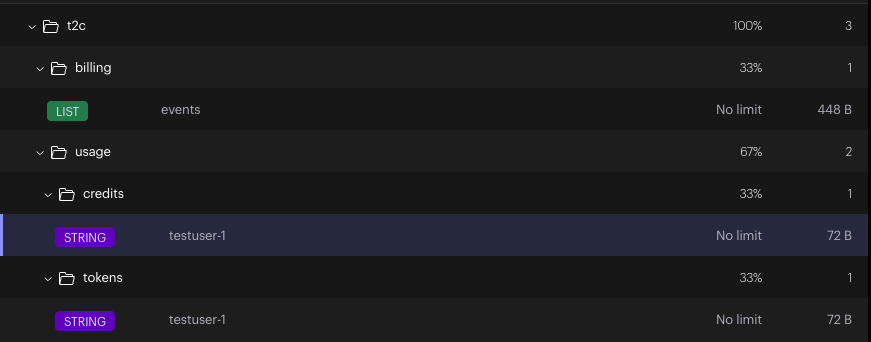
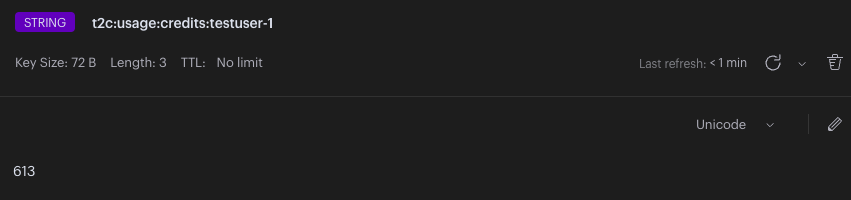
정상적으로 동작을 하는 지도 확인해보겠습니다.
플러그인 옵션을 설정해주고,

실행을 시켜서 redis에 정보가 잘 저장되었는지 확인 하면 아래 이미지 처럼 정상적으로 저장이 된 것을 확인할 수 있습니다.
'네트워크 > APISIX' 카테고리의 다른 글
| AI 트래픽을 관리하는 방법: APISIX로 AI Gateway 만들기 - 1편 (0) | 2025.10.31 |
|---|